So Microsoft defender for mac has now appeared when you download and install the full Office 365 package for your mac. According to some reports the software has been around since 2019; however its only now been include in the full build of 365 for Mac download. Looking at the programme you would think that it would be as simple setup as it if by default on a windows machine.
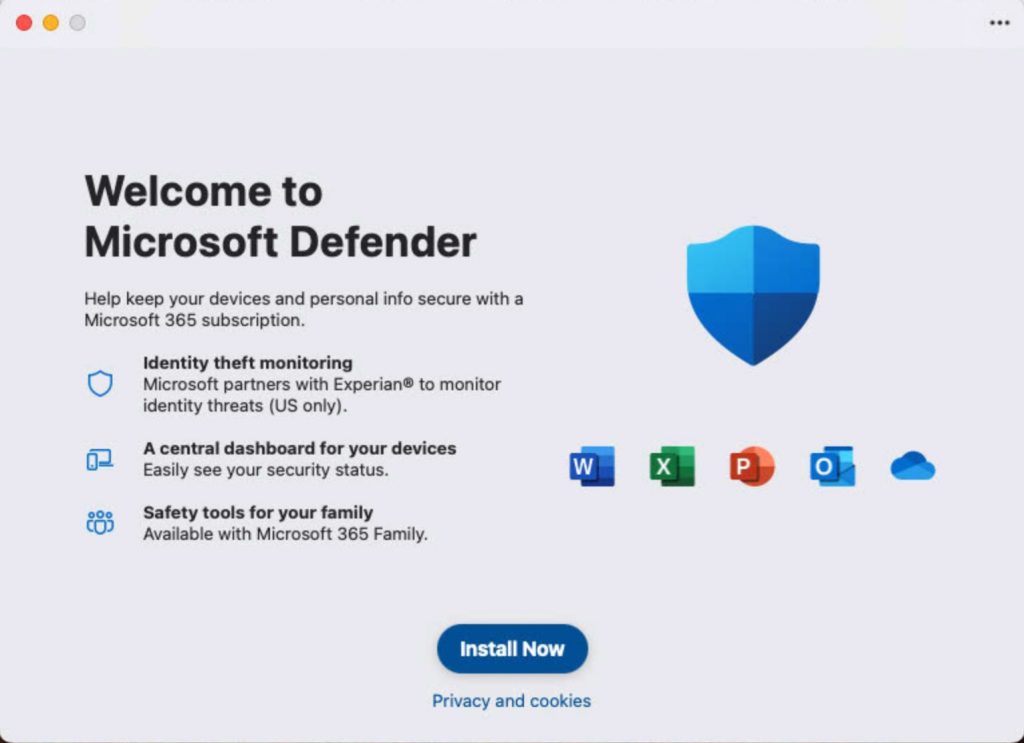
Well, you would be greatly disappointed. The programme needs a registered Microsoft individual account to work and before you rush off and create a dummy Microsoft account to pair the software to the mac the account does need a Microsoft 365 personal or family licence to work with.
For business users it’s not that easy either you need the Business packaged bolt on to your work account. Prices start at £2.5 + vat per user. (click here for link)
So, you’ve gone through the hurdles, ticked all the boxes, and managed to register the device on your individual Microsoft 365 account. Next, you will encounter the privacy and security tick box to enable the program to run in the background as a live antivirus for your Mac. This process has been well fine-tuned since Apple’s OS decided to lock down the software in System Preferences, or as it is now called in the latest OS versions, System Settings. The Microsoft Defender Shield icon marks itself with a little tick to show it’s live and enabled via privacy and security.
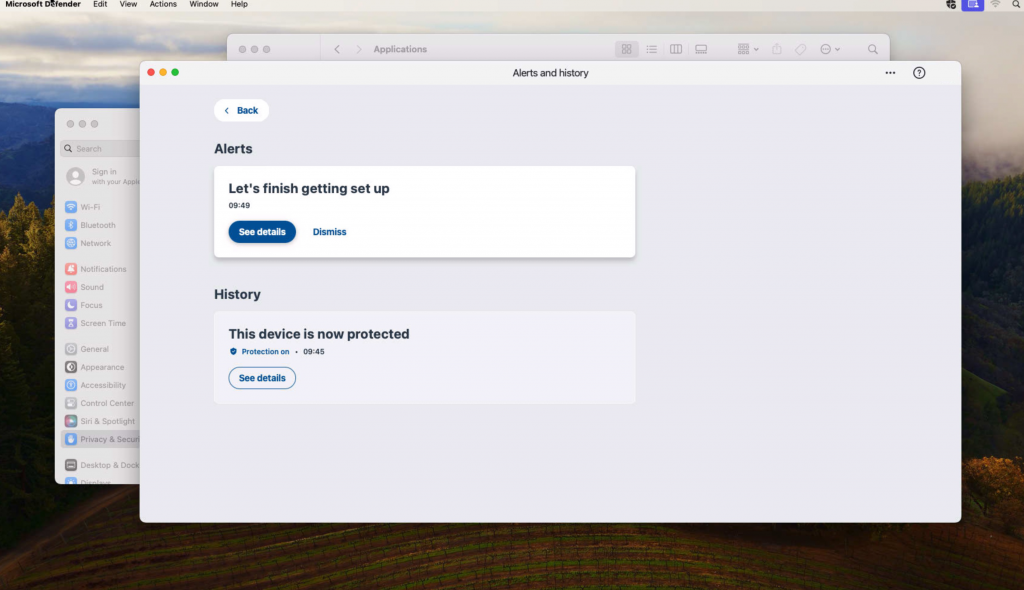
Like most other Anti Virus for Mac, the programme is managed from the finder window at the top of your mac. There are 4 options:
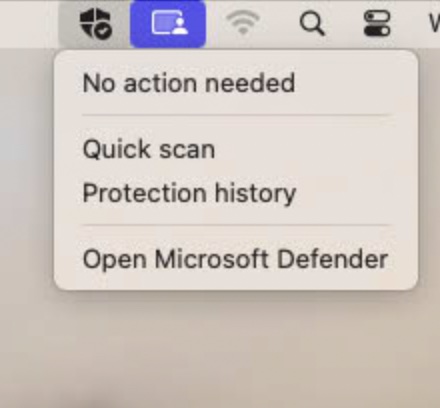
1: Live event “no Action needed”
2: Quick Scan “scans the drive for suspect issues etc”
3: Protection history “ in short a list of the scans, any upsets or highlights of the programme”
4: Open Microsoft Defender “ the programme when you can manage the software programme”
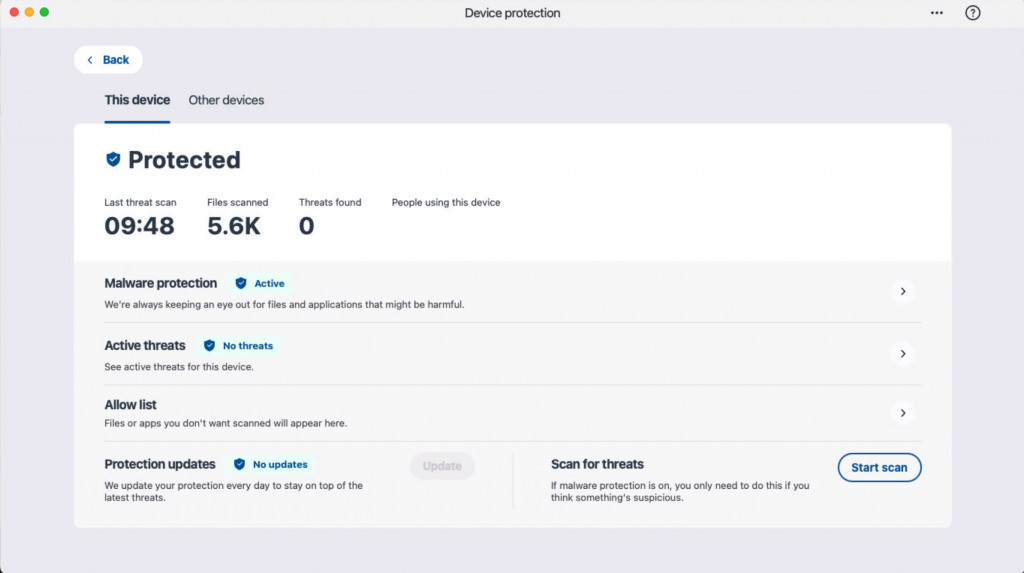
As for its reliability, well, we will need to wait and see. It is very basic and has limited functions, unlike some of the paid competition programs like Bitdefender; however, the interface within the managed devices in the Defender online portal is very clear and has a clean layout. As for people adopting Microsoft Defender for their Mac, I would doubt it.
The hurdles you have to go through just to install it on your Mac due to license issues are enough to put people off. If you already pay for your individual or family version of 365, then yes, you might adopt it for your Mac. It’s worth running a test of the software to see how you get on. Let’s not forget there are several ‘free’ versions of antivirus out there, including Malwarebytes and AVG, to name a few. I would always err on the side of caution with anything free, and antivirus programs are no exception.
Finally, I inputted Microsoft Defender and what it used to be called Windows Defender ‘for Mac’ into ChatGPT, and its response was very entertaining and around 12 months out of date. Oh well…
I am tempted to place its response in this article, but to dangle a carrot and see what results you get, why not input your own search and see what results you get.
Anyhow, enjoy your day, and see you soon for the next Mac announcement.