When you setup a Watchguard VPN using IKEv2 you will need to download the installer for file to setup the profile for your computer or smart phone. The Watchguard includes it all within a package build. It’s a zip file you just need to unzip it and then located the folder to the Operating System you are using. So in our case you open the MacOS_IOS folder and either double click or right click and install the WG IKEv2.mobileconfig profile.
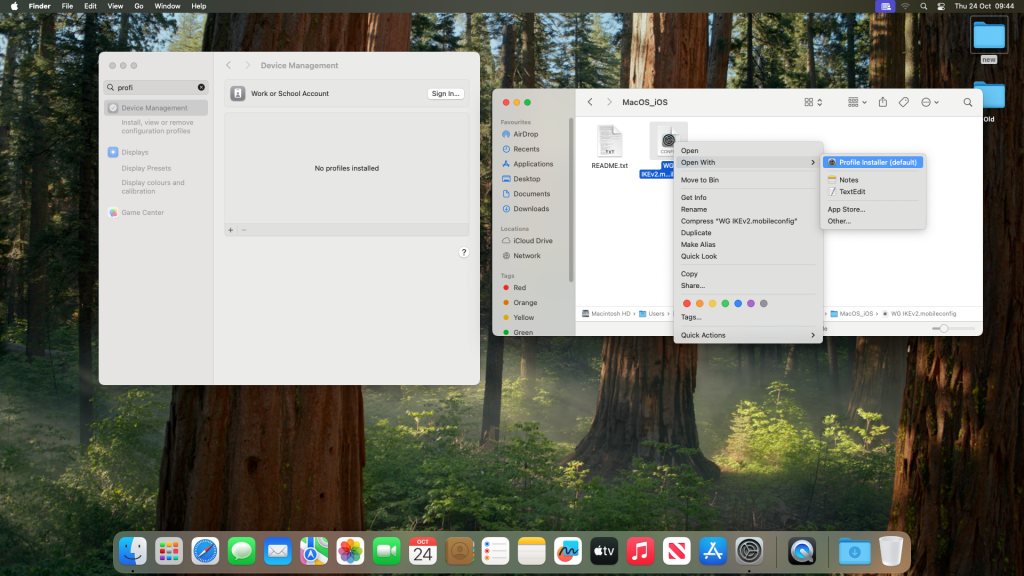
So at this point it will just tell you the profile is downloaded and ready for you to review. You should not be asked for a Admin password.
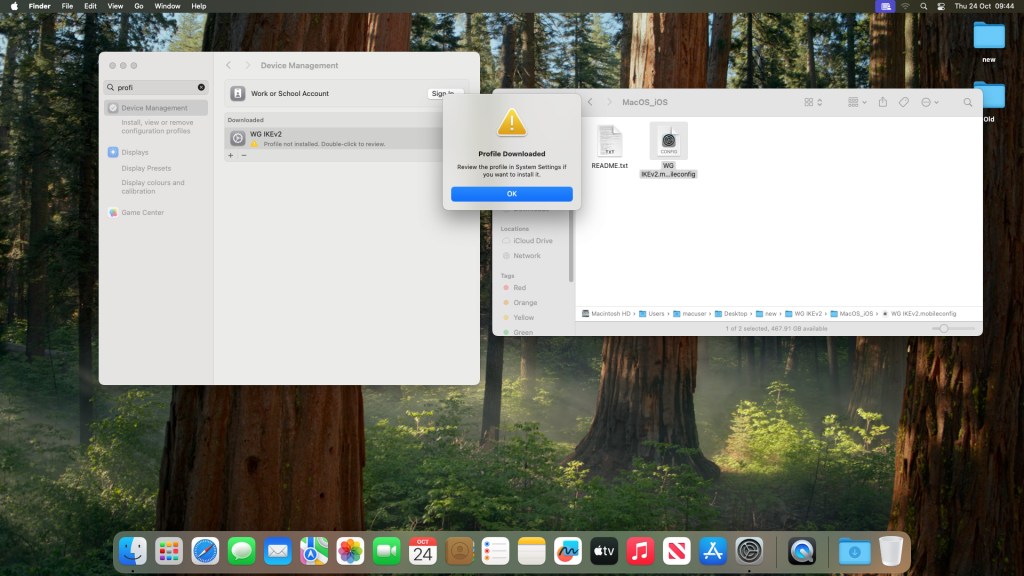
You now need to go into System Settings (system preferences old school) in the search bar type profile. It should come up with the profile you have just installed. You now need to double click it to open it.
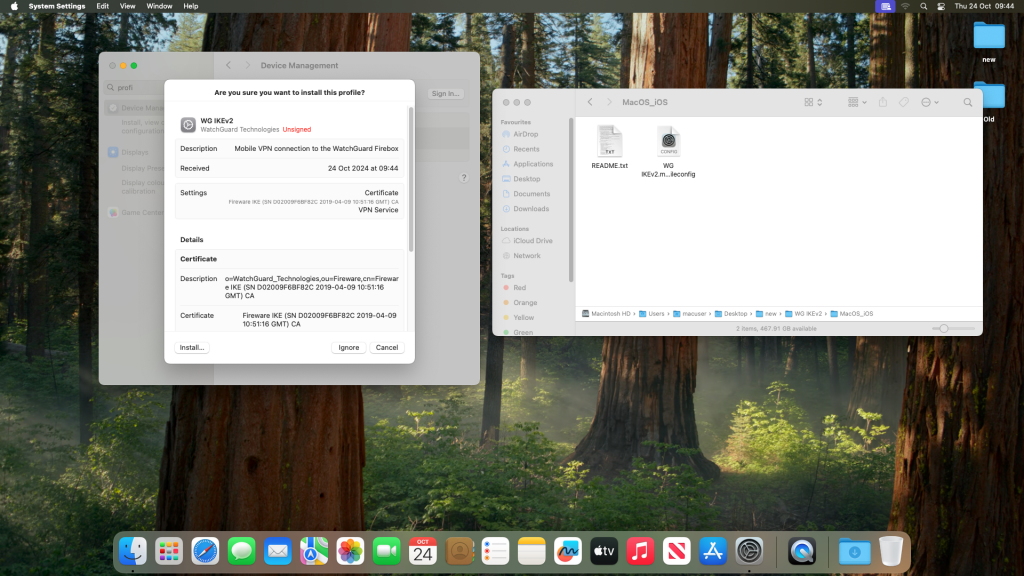
We now need to install the Certificate. So click the install button (bottom Left) and run the installer.
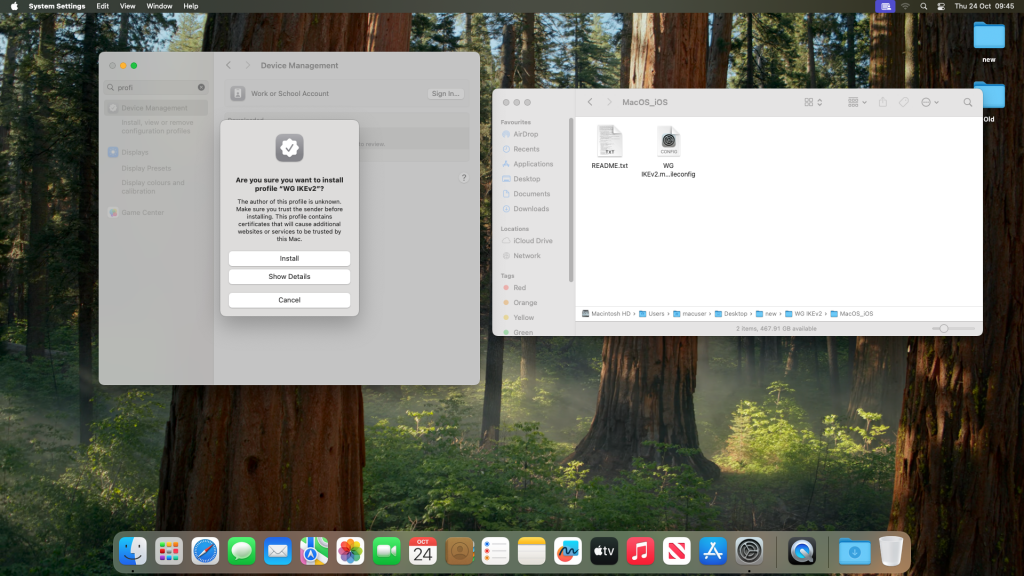
It asked you to confirm the installation so click install.
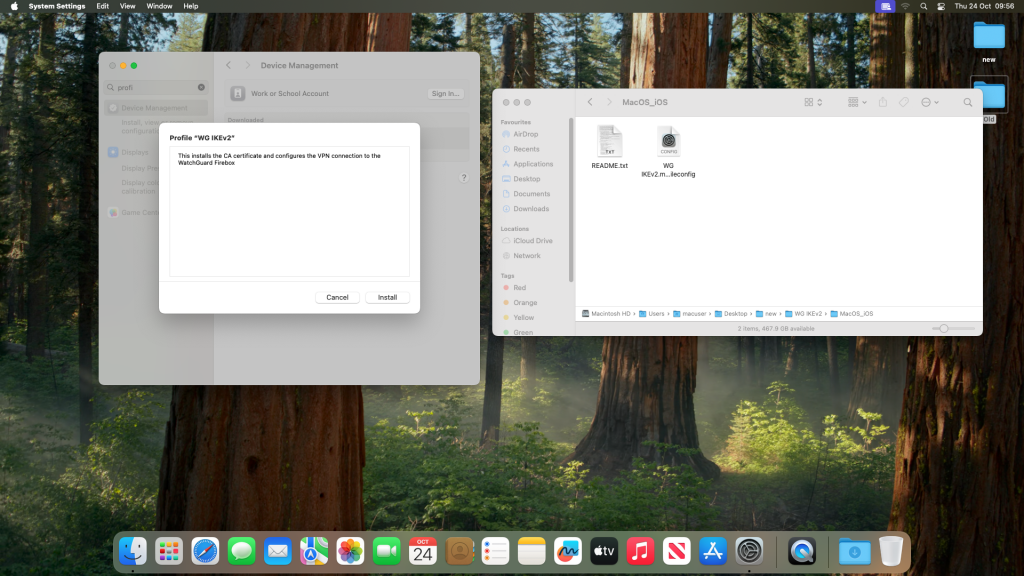
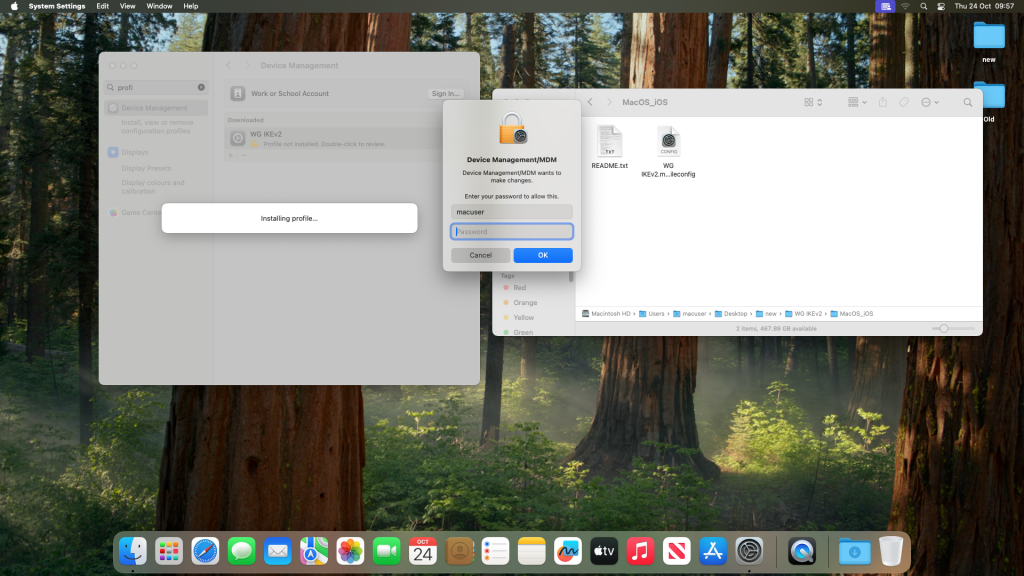
It will now ask you for the admin password to install the certificate.
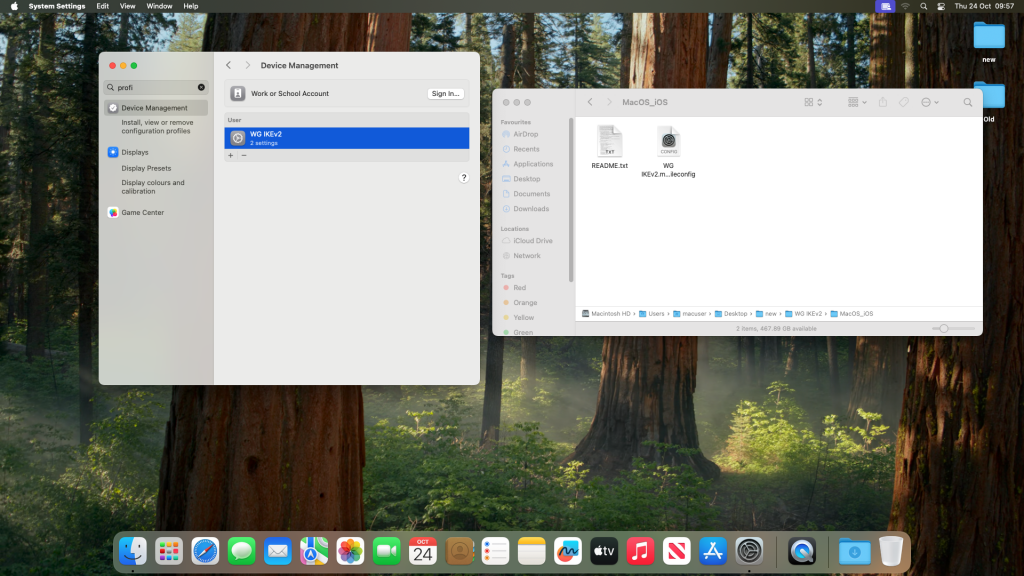
You should be left with the profile and the VPN certificate installed. We now need to move to the VPN side of the programme to fill in the VPN details of the account that you are asking.
Back in the search bar type VPN
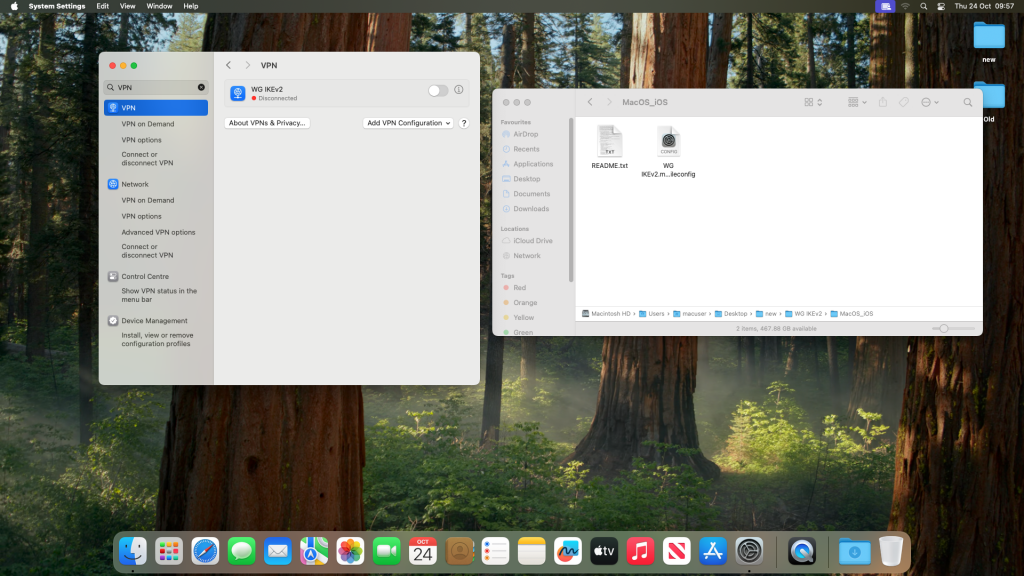
To add the details to the VPN click the I button in the to right of the VPN which then shows you the user details field you need to fill in to get the VPN working.
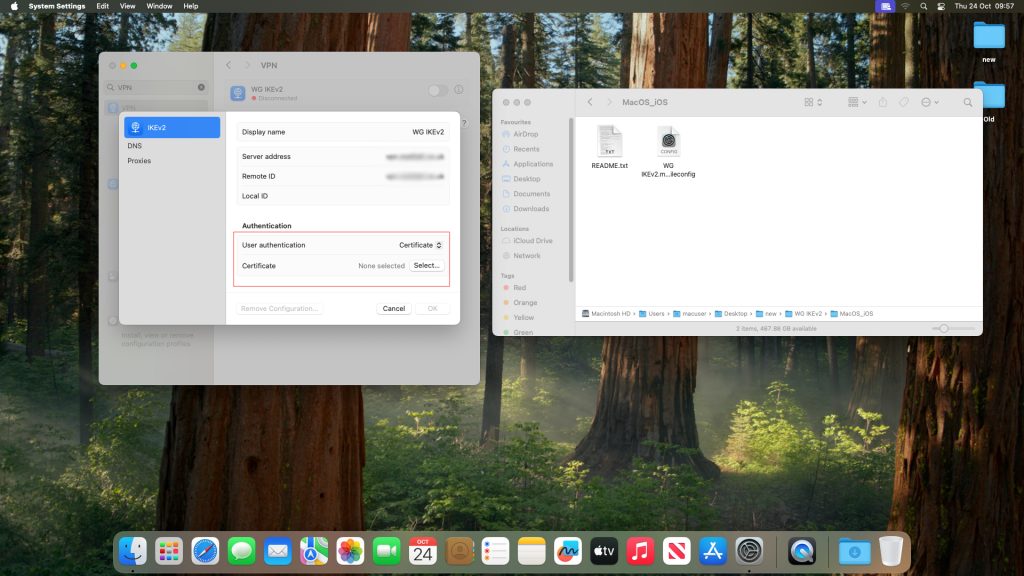
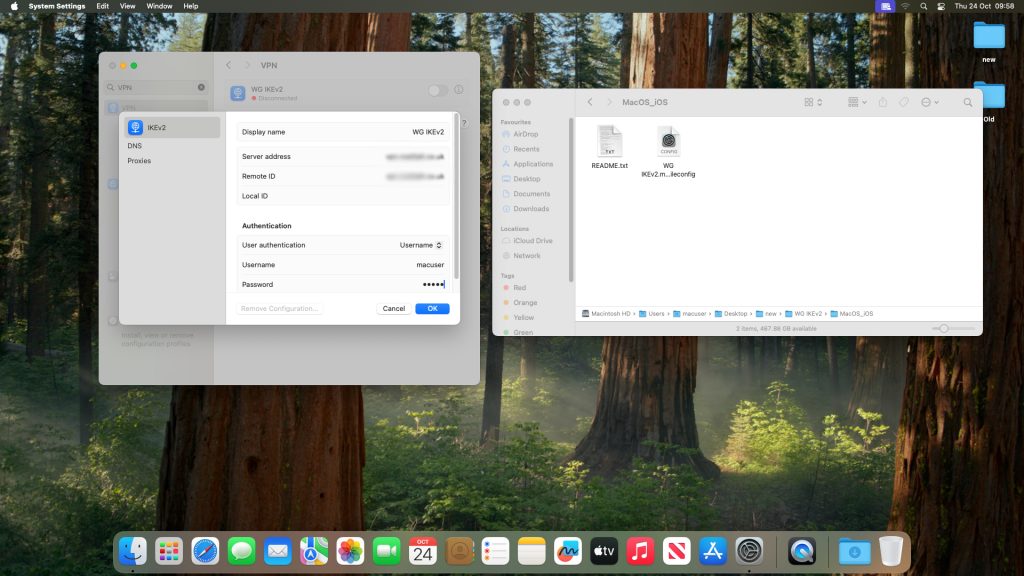
Amend or delete a profile
I through I would add a quick guide to how to delete or amend a profile. In short If the profile has changed then just delete it and start again.
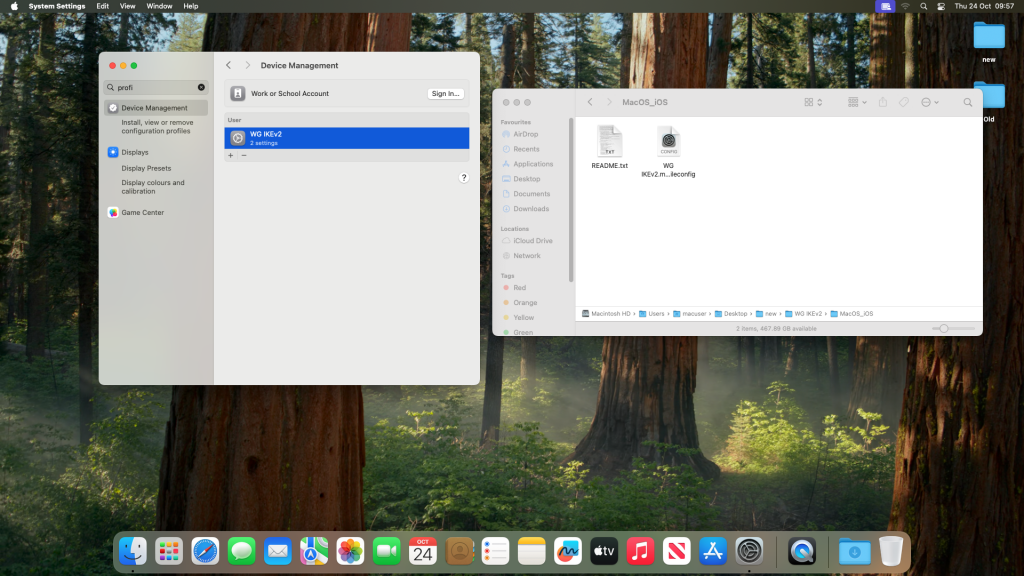
You need to go into the profiles from system settings. Highlight the profile and click the – button.
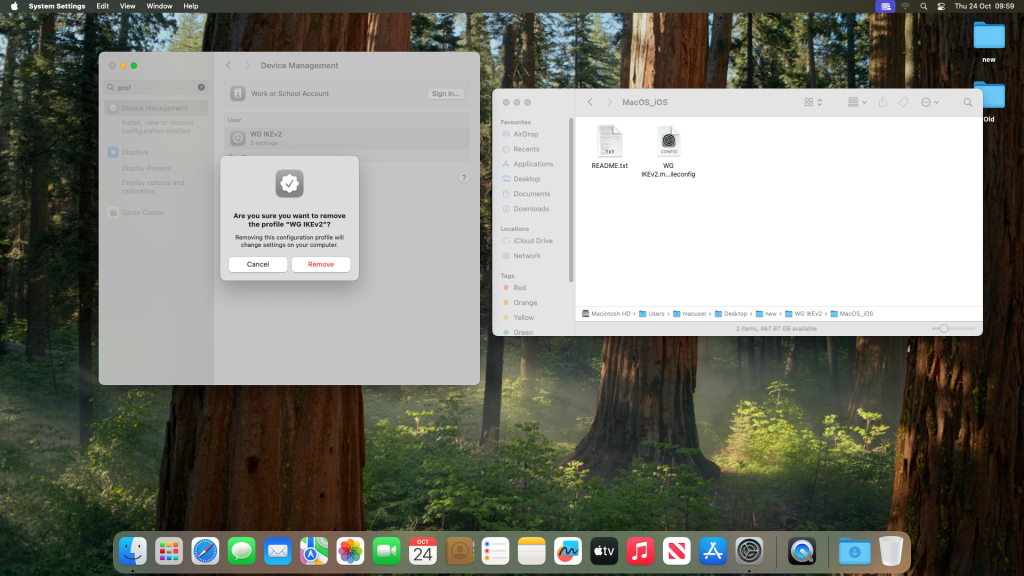
You will be promoted for the admin password.
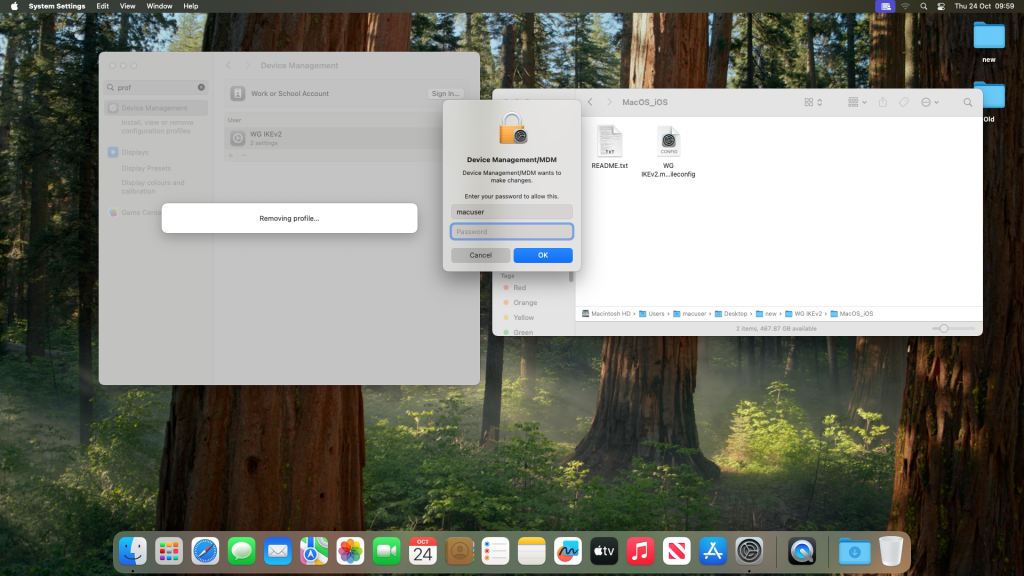
You should then see the profile has been removed and you are now free to add a new profile.
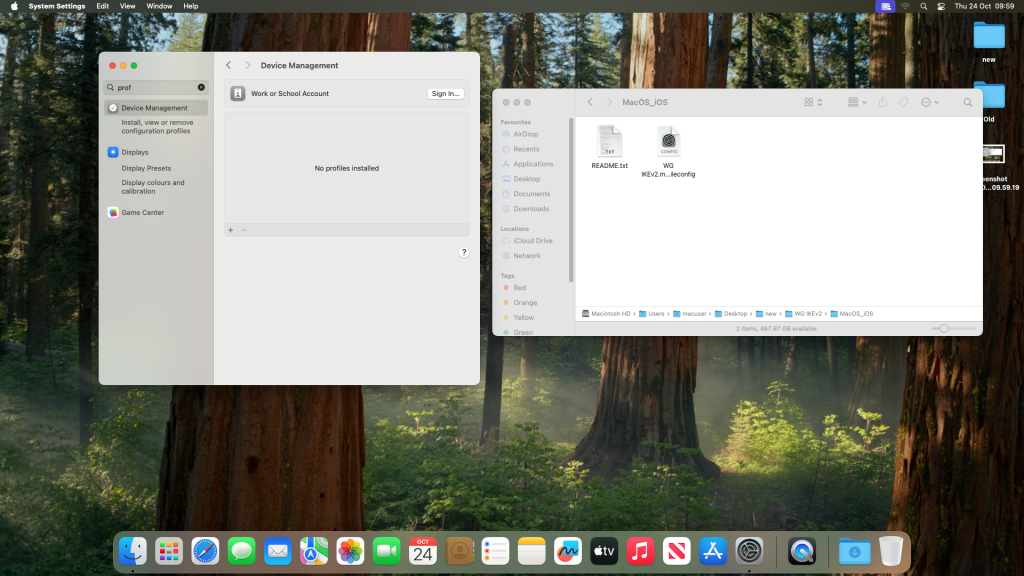
See above a clear profile, ready for a new profile to be loaded.
