The process to remove Windows from your Intel Mac is relative straight forward if you follow this guide. Basically you’re going back int o Boot Camp Assistant and run through the wizard to remove the partition. It should be plain saying however sometime you do come up with an error or blip from the Assistant. There is also Disk Utility which can help you with this task if needed.

Before you do anything ensure you have the data off the Windows partition you need as you will not be able to get it back. I would also stress Time Machine may not get the data of the drive so I would not rely on it for anything on the Windows side of the drive.
Method 1: Use Boot Camp Assistant (Recommended)
Back Up Your Data:
If you have any important files on the Windows partition, back them up before proceeding.
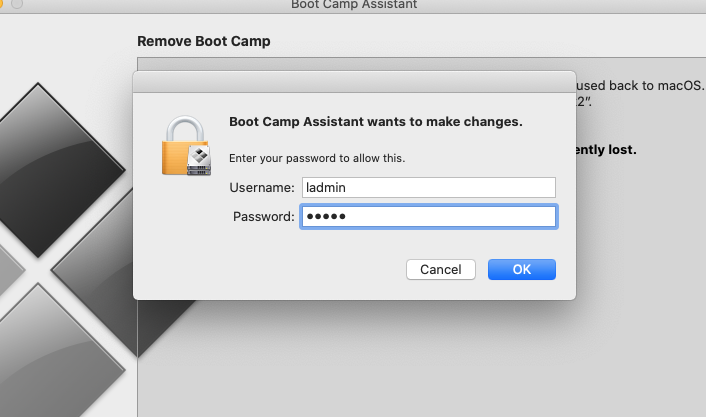
Login as Local Admin:
Open Boot Camp Assistant:
- Click Launchpad → Other → Boot Camp Assistant
- Or search for “Boot Camp Assistant” in Spotlight (Cmd + Space).
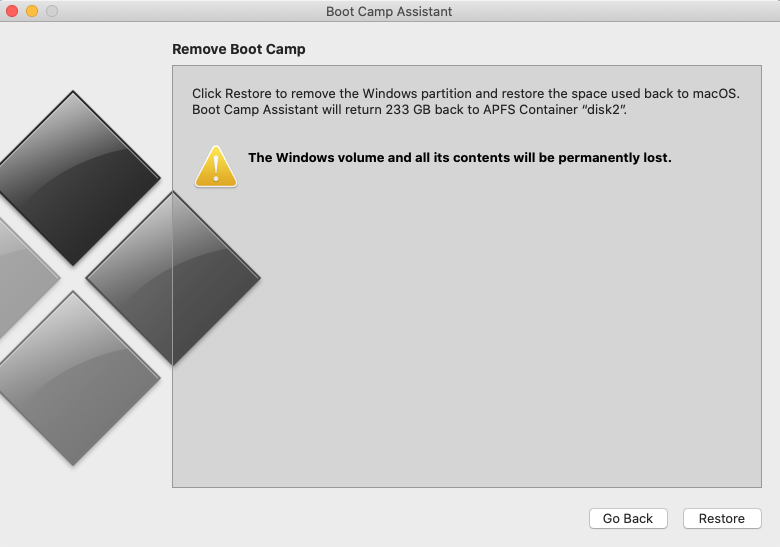
Remove Windows Partition:
- In Boot Camp Assistant, click Continue.
- Select the option to remove Windows or restore macOS.
- Click Restore to delete the Windows partition and merge the space back into macOS. Once you input the Admin Password.
Wait for the Process to Complete:
- The partition will be deleted, and your Mac’s storage will be restored to a single macOS volume.
Method 2: Use Disk Utility (If Boot Camp Assistant Fails)
If Boot Camp Assistant doesn’t work, you can manually remove the partition using Disk Utility.
Open Disk Utility:
- Click Launchpad → Other → Disk Utility.
- Or search for “Disk Utility” in Spotlight.
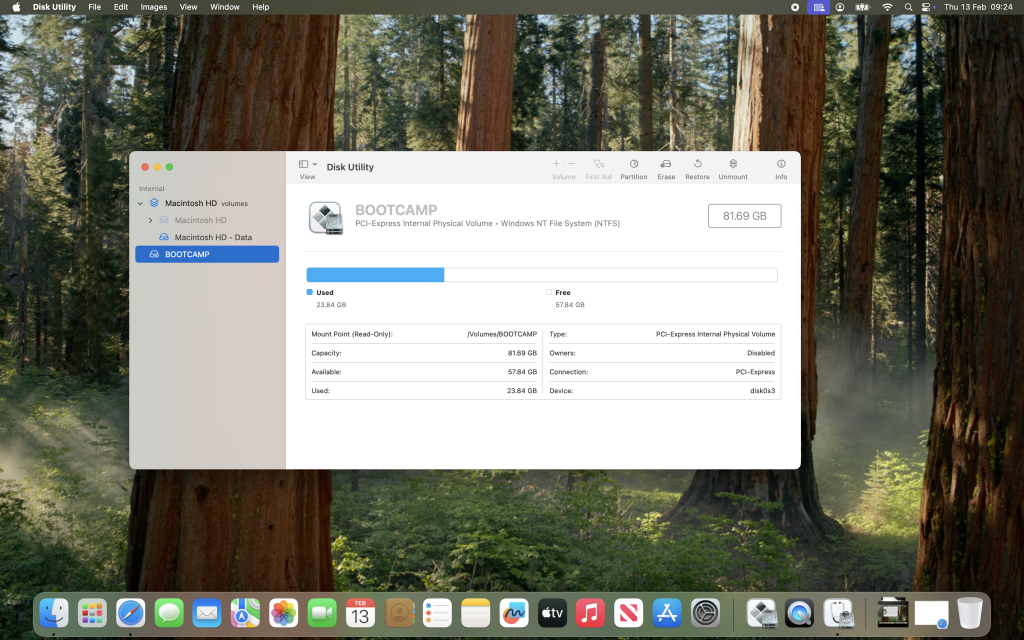
Locate the Boot Camp Partition:
- In the left sidebar, find the BOOTCAMP partition (it might be labeled as “Windows” or “Untitled”).
Delete the Partition:
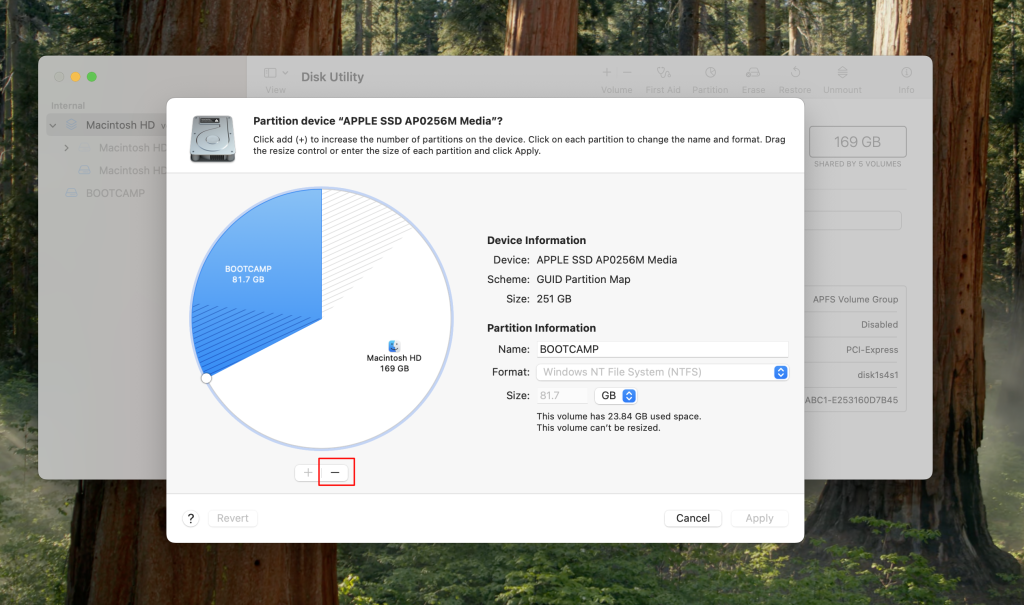
- Select the BOOTCAMP partition and click Erase (if available) or Delete Volume (-).
Resize the macOS Partition:
- Select Macintosh HD (your main macOS drive).
- Click Partition → Drag the slider to use the entire disk space.
- Click Apply to merge the free space back into macOS.
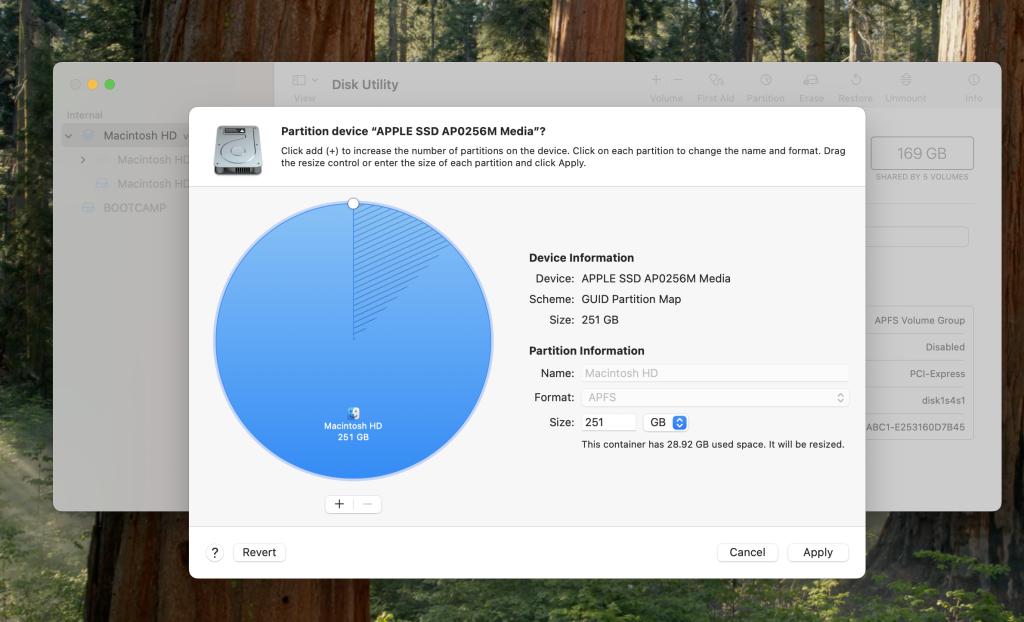
Restart Your Mac to ensure the changes take effect.
Troubleshooting Tips
- If Boot Camp Assistant gives an error, try restarting your Mac and running it again.
- If Disk Utility won’t let you resize the macOS partition, you may need to use Terminal or boot into macOS Recovery Mode.
- Worst Case scenario you might need to reformat using APFS or Mac OS Extended (Journaled) and restore from Time Machine backup.
Related Articles :
Short Video on how to remove the Boot Camp Partition click here